

I've decided to add clarifications on game situations. I've also attached images and links to those images hosted on my own website for clarification.
HEX TILES
The game is composed of several hex tiles arranged in a pattern. This area is known as the "golf course." Hex tiles have anywhere from three to six spaces for moles. The number of spaces on a tile indicates how many points it's worth during end-game scoring.
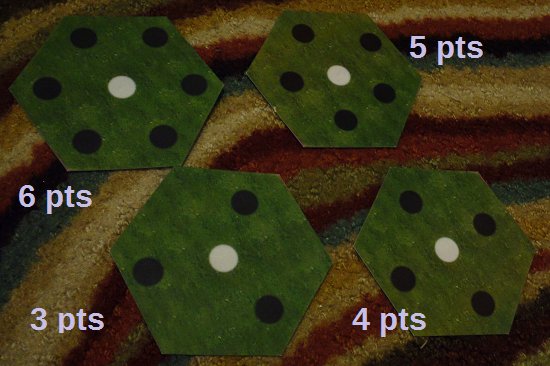
Different hex pieces that comprise the golf course.
STARTING THE GAME
Players choose a starting hex at one side of the board. Our example has a nine-hex center area, with four hexes off at the sides of this larger mass. Players have arranged their pieces on all available spots of that hex, and place a claim token at the center of that hex, indicating that it belongs to a certain player. At this point, the only qualifier for starting hexes is that there must be at least one hex between one player's starting hex and another player's starting hex, and it needs to be along the edge of the golf course.
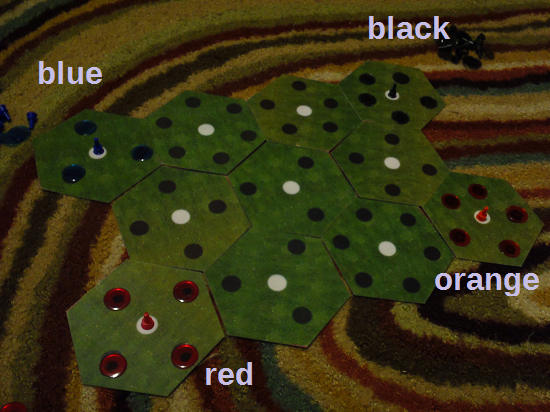
Example of a game setup with 11 hexes.
Players draw a hand of five cards. Once the first player is determined, they draw an additional two cards and begin their turn.
PLAYER TURNS
Play proceeds thusly.
- Play a card.
- If it's a NUMBER card, add up to that many moles to a claimed hex or move moles to an available hex, or some combination of adding and moving.
- If it's a HAWK card, that player initiates an ATTACK. See below for information on attacking hexes.
- If it's a FORE! card, that player initiates a PANIC. See below for information on mole panic.
- Draw a card.
- If a player has no cards left in their hand at the end of their turn, they may draw up to a full hand of 5 cards instead of just 1.
MOVING OR ADDING
Below is an example of Moving moles from one hex to another. Note that you must have a hex Claimed before you may move moles from it to another hex.
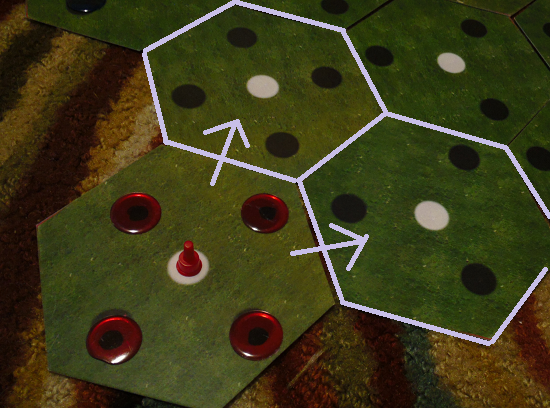
Moving a mole from one hex to another.
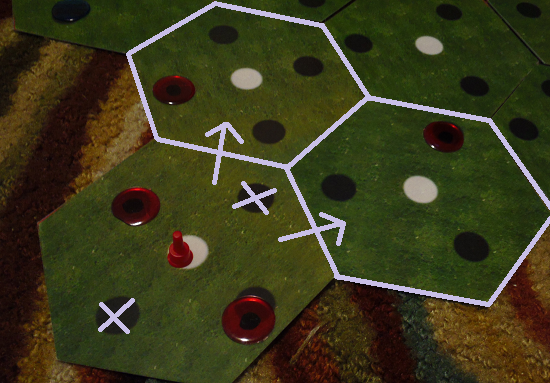
End result of a move. Note that moles have been moved from a claimed hex to an unclaimed hex.
RESUPPLY
There are cards that have a +1 or a +2 on them. This is a "free addition" of moles from a Player's pool to a hex they already control. They cannot add these free moles to a hex unless they have a matching Claim Token on it. See below for more information on Claimed hexes.
Some cards have simply a +1 on them, and that's it. Players may play this card in addition to another card on the same turn.
WHEN A HEX IS FULL OF MOLES
At the point when all spaces on a given hex are filled, then it must be claimed by the majority leader. Simply look at the moles on a hex and see who has the most on it. In the following example there is an uncontested hex: only one player's moles are present on it.
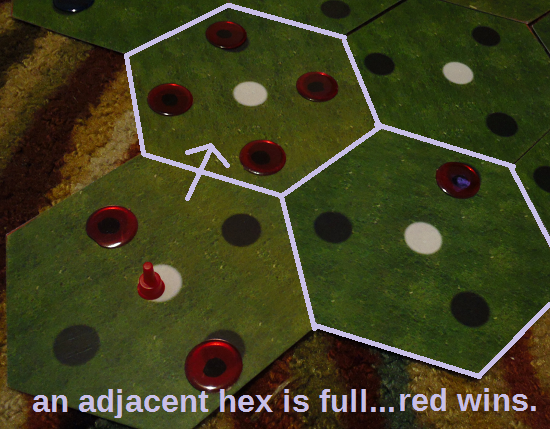
Red claims the hex, as it is uncontested and there are no spots remaining for moles.
CONTESTED HEXES
There are times when Players may place a mole on a spot where another Player has already placed moles. That's okay. This is where the prototype earns its name. The hex is still considered claimed when all the spaces are full. However, it's the player who has the most moles on that hex that earns the token. See below for an explanation.
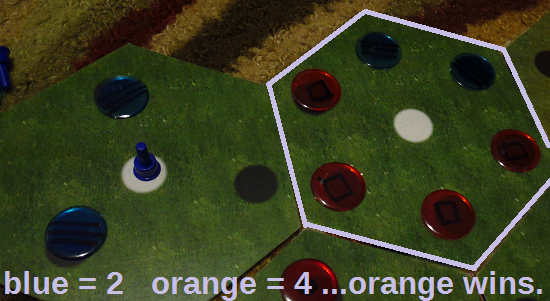
In this hex, Blue has two and Orange has four hexes. It's now full.
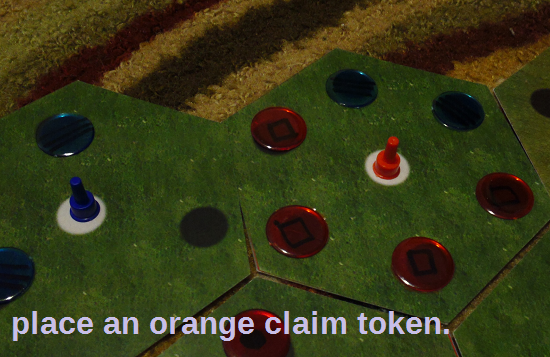
Orange places a claim token on the hex since they have more moles occupying it.
BREAKING TIES ON CONTESTED HEXES
There may be times when there are an equal number of moles from two or more different players occupying a hex that is full but still doesn't have a claim token on it. If this is the case, simply put a claim token at that hex for the last player to move their moles into the hex. This is illustrated in the following graphics.
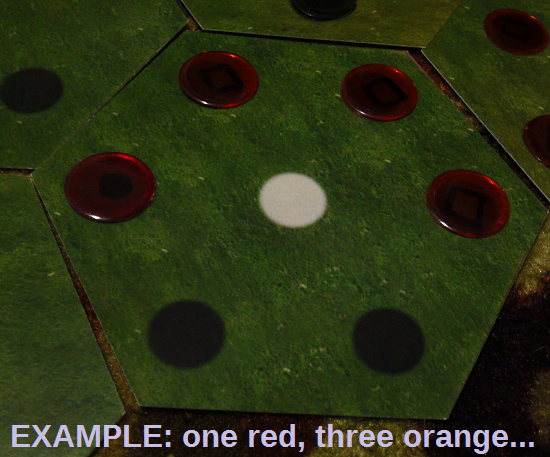
This is a hex with three orange and one red on it.
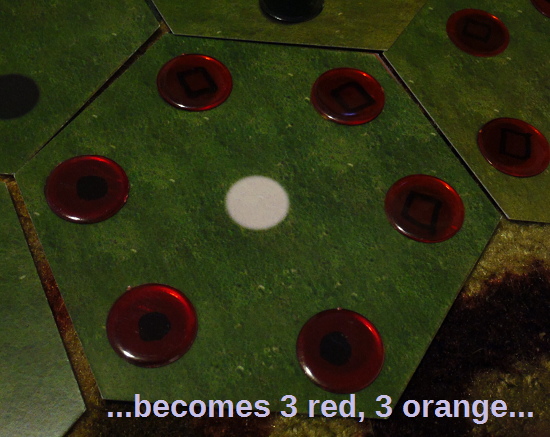
Red has placed two moles in this hex from neighbouring hexes.
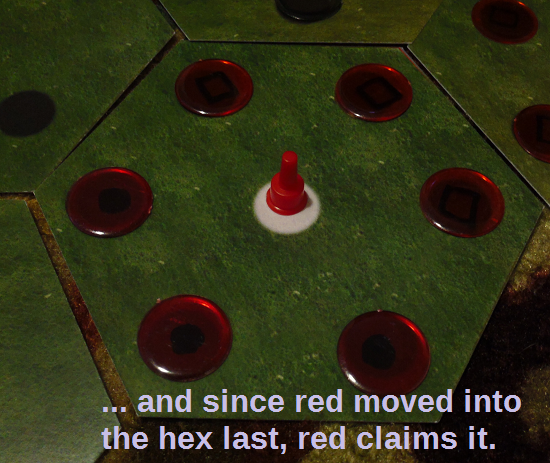
Since Red is the last player to move into the hex and it's now full, Red claims that hex.
ATTACKING
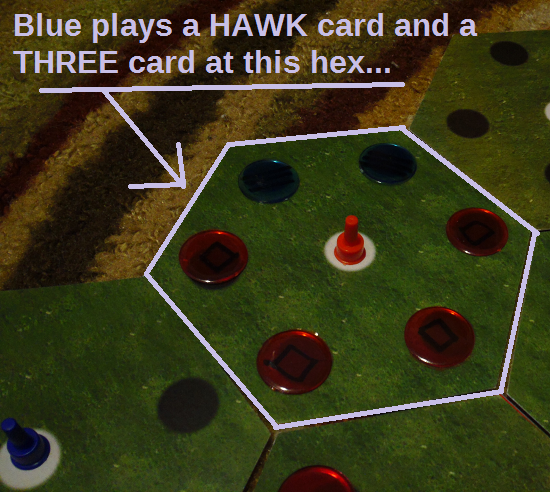
The HAWK card is how players attack one another. It is the first card of a two-card combo. To attack a player plays the HAWK card, followed by a number card.
The number is the quantity of moles the player may remove from a single hex. So if a player uses a 3 card when they play a HAWK card, they may remove up to 3 adjacent moles from a single hex.
An important aspect to HAWK cards and removing moles is that moles must be removed from adjacent spots on a hex. In other words, think of the HAWK moving in a line around the hex, picking off moles all in a row.
Blue has used a HAWK on this hex. Blue then plays a 3 card.

Orange has had three moles removed from this hex.
Also note that there is a +1 or +2 on a HAWK card. A player is allowed to Resupply a claimed hex with the corresponding number of moles from their pool.
FORE! INITIATING A MOLE PANIC
To initiate a mole panic, one plays a FORE! card (it has a big, flying golf ball on it and a lightning bolt icon in the corner). Then the player follows these steps:
- place the FORE! card in an opponent's draw pile.
- draw up to 3 cards randomly from the opponent's hand.
- select one of those three cards and keep it in your hand.
- return the other two cards to the opponent's hand.
Players may also play a RESUPPLY card after a FORE! card, the same as when they play a NUMBER or HAWK card.
ENDING THE GAME
The game ends when one of two conditions are met:
- All hexes have a claim token on them, at the end of a player's turn, OR
- One player is out of Claim Tokens (each player has 10)
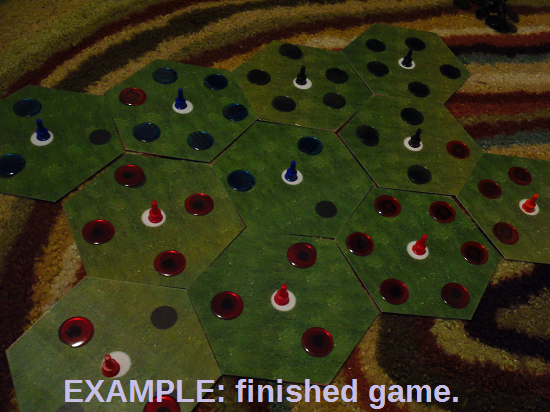
To determine the winner, Players add up all their points from hexes where they've placed a claim token. The Player with the most points wins. If there's a tie in the number of points gained in hexes, then the Players add up the total number of moles they've placed on the board. If there's still a tie, then add up the numbers found on the cards in the Player's hand.


